
Create new menu sections to appear on the navbar through your website's settings.
Menu sections are broader categories where individual pages are listed. For example, the stock “About Us” section includes multiple pages including “Contact Us” and “Testimonials.”
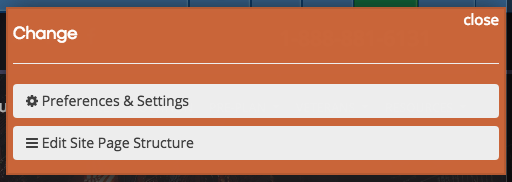
To create a new menu section, first click on the “Settings” button on the blue bar at the top of the page. From the drop-down menu, click on “Edit Site Page Structure.”
At the top of the page next to “Website sections and pages,” click the “Add New Menu Section” button.

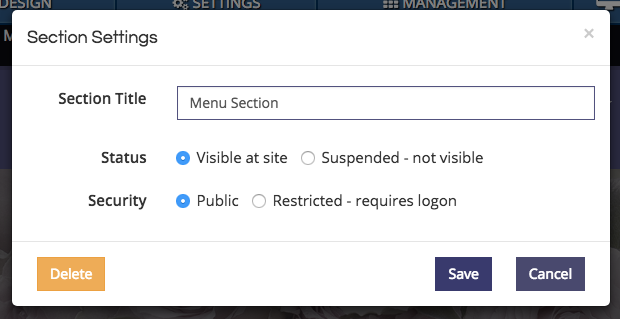
A pop-up box will appear. Enter the title of the section in the box. Below, you can adjust the visibility of the pages within it. A suspended section can be accessed with a direct link, but it will not appear in the menu bar. A restricted section can only be viewed when logged into the website. This can be used for creating new pages that are not ready to be published.
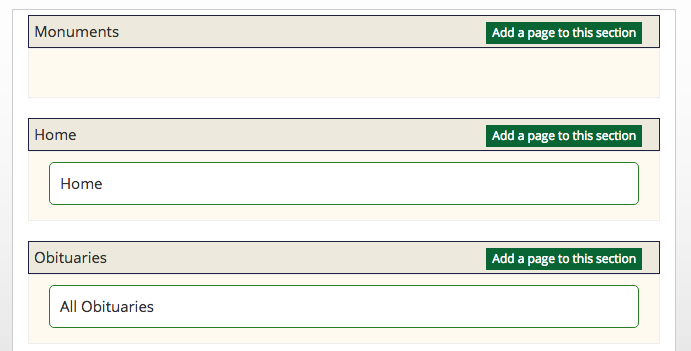
The newly created section will appear at the top of the list. It will not contain any pages until they are added with the green “Add a page to this section” button.
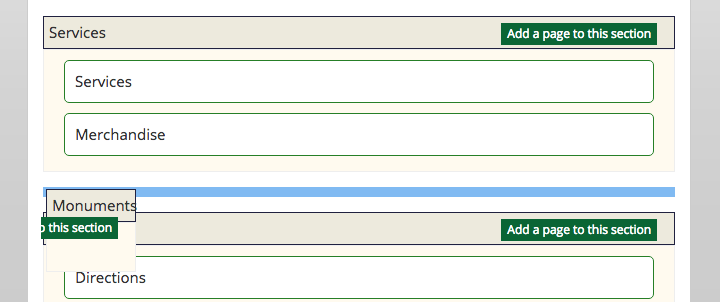
You can reorder the sections by clicking and dragging them. The blue bar will indicate where the section will be located should you release your mouse. All sections can be moved at any time.
The new section will not appear in the menu bar until you have added a page to it. Click on the green button to create a page.

Once you have created a page, it will appear under your new section. You can add as many pages to a section as you would like.

After saving your changes and refreshing your browser, you will see the new menu section in the navbar of your website. If the section only has one page, clicking on the section title will link to it. If a section has multiple, such as the “About Us” section on this sample website, users will have to hover their mouse on the title to view all pages contained within it.
