
You can approve all user-uploaded content from the admin side of your website.
To prevent spam and solicitations from being posted on your website, CFS allows you to approve all incoming posts for a guestbook. As soon as you log into your site, you will receive a notification of any pending content.

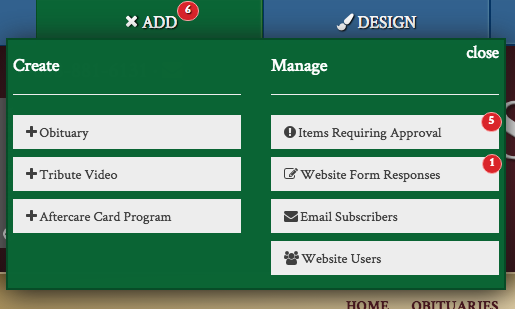
To view these entries, click on the “Review Pending Content” button in the white box. You can also access pending content by clicking the green “Add” button in the top right of the screen.
Click on the “Items Requiring Approval” button in the top right of the drop-down menu. The red notification bubble indicates how many posts are awaiting your approval.
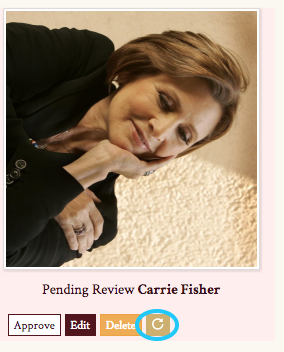
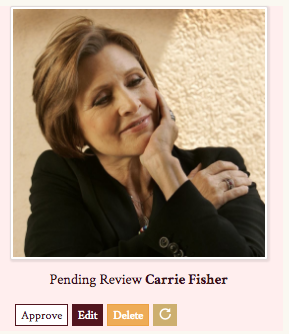
All pending condolences and photos will appear on this screen. To allow these entries to post, click the “Approve” button on the right end. If a posting is inappropriate, click the “Delete” button on the far right corner.
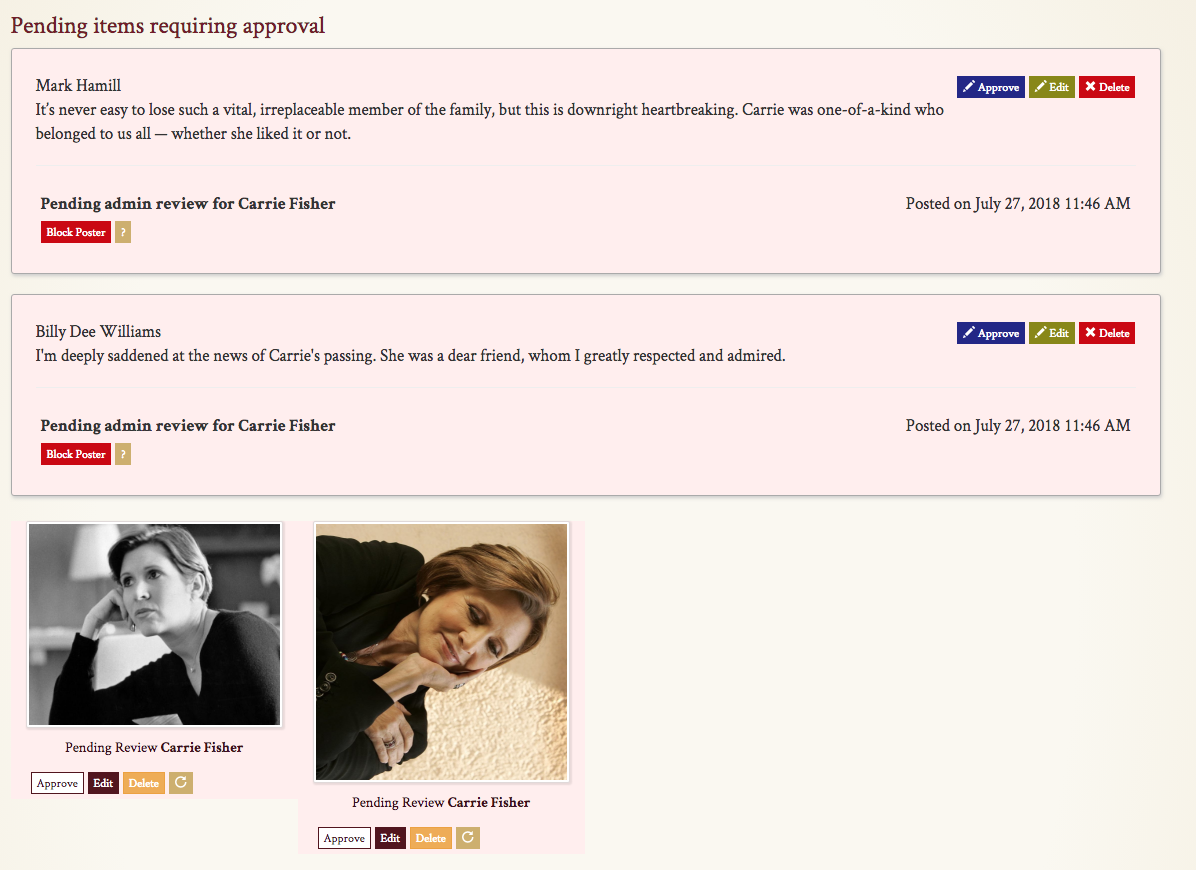
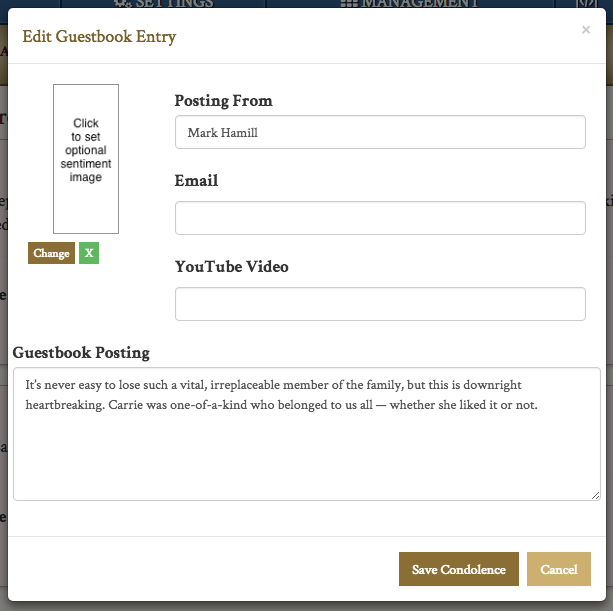
You can also change a message by clicking “Edit” button between “Approve” and “Delete.” A pop-up box will appear, allowing you to adjust the message if necessary.
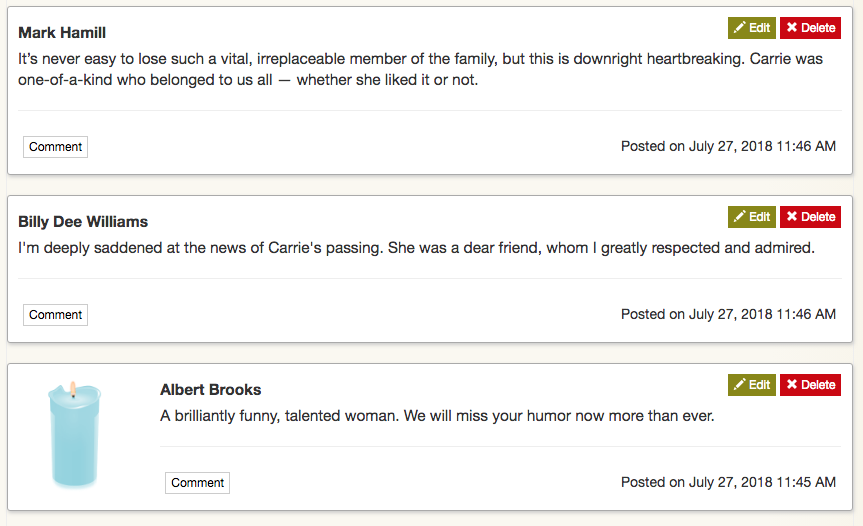
Even after a condolence has been published, you can still edit or delete entries by viewing the guestbook while logged in.
Submitted photos can also be edited or deleted while logged in.
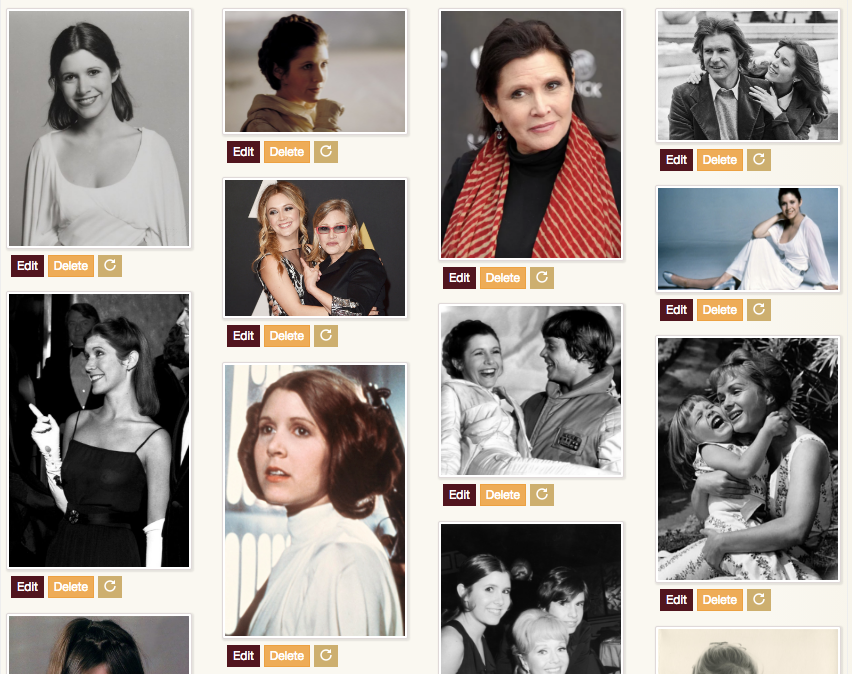
If a photo is sideways or upside down, you can rotate the image by clicking the highlighted button below.
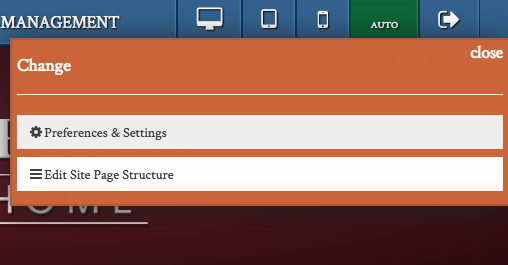
When a condolence is awaiting approval, CFS will notify you by email. To specify which email should receive these messages, click on the “Settings” button in the blue header bar. From the drop-down menu, select “Preferences & Settings.”
Near the bottom of the page, you will see two text fields for “Pre-Need Email” and “Content Review Email.” The address entered under “Content Review Email” will receive a message when a posting is waiting for review on the website. Multiple emails can be added by typing a comma between each address. Be sure to press the “Save Changes” button on the bottom of the page.
